Paper Clip Embroidery: A Designer’s Practical Review
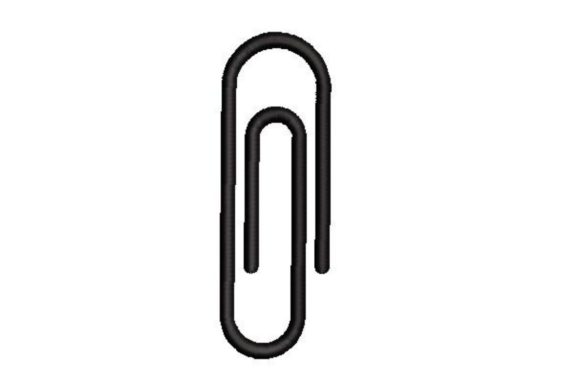
When evaluating a new machine embroidery design for my studio, I look past the digital preview and immediately visualize how it will behave under the needle. The Paper Clip design is one of those deceptively simple assets that demands a critical eye. At first glance, it appears to be a straightforward geometric shape, but as any experienced embroiderer knows, clean lines and open spaces are often where technical execution matters most. This isn't just a graphic; it is a functional design element that can bridge the gap between professional office aesthetics and playful, personalized charm.
My first impression of this design is its remarkable versatility. It lacks the visual noise of complex illustrations, which makes it an excellent candidate for minimalist branding or subtle decoration. However, simplicity in embroidery is unforgiving. There is nowhere to hide poor digitizing or tension issues. When I loaded this file into my software, I was looking specifically at the pathing and stitch type. Is it a continuous satin stitch, or does it rely on running stitch outlines? For a paper clip shape, the structural integrity of the stitch is paramount. If the curves aren't smooth or the corners too sharp, the final result will look jagged rather than sleek. This design feels like it belongs in the "School" category not just because of its subject matter, but because it serves as a foundational building block for larger creative projects.
Real-World Application: The Teacher Appreciation Tote
To truly test the viability of this embroidery file, I applied it to a recent client project: a batch of canvas tote bags intended as teacher appreciation gifts. The goal was to create something that felt professional yet warm, avoiding the generic "apple" motif while still acknowledging the educational setting. We chose a natural cotton canvas bag and opted for a deep navy thread to mimic the color of a classic ballpoint pen.
In this real-life scenario, the Paper Clip design performed exceptionally well as an anchor point. We placed it on the lower right corner of the bag, acting as a visual frame for the teacher's name stitched above it. Because the design is linear and unobtrusive, it didn't compete with the text. More importantly, we utilized the product description’s suggestion to add personality. By stitching a simple smiley face interacting with the clip, the tone shifted instantly from corporate stationery to handmade warmth. This duality is where the design shines for Etsy sellers and small shop owners. It allows you to sell the same base asset to two completely different demographics: administrative professionals wanting polished gear and parents wanting cute, personalized school supplies.
The stitching process on the canvas revealed the importance of stabilizer choice. Canvas has a distinct fabric texture that can swallow fine details. I used a medium-weight tear-away stabilizer to keep the fabric taut and prevent the narrow satin columns from tunneling. The result was crisp and legible, proving that this design holds up on heavier substrates when properly supported.
Navigating Fabric Challenges and Technical Limits
While the tote bag test was successful, I must advise caution when applying this design to other mediums. Not all fabrics treat linear designs kindly. If you are planning sweatshirt embroidery or working with stretchy knits, the long, uninterrupted stitch lines of a paper clip can cause puckering if the stitch density is too high or the stabilization is inadequate. Knit fabrics move; rigid shapes do not. Always test on a scrap of your actual garment fabric before committing to a full production run.
I also recommend hesitation when using this design on very dark fabrics without modification. A thin paper clip outline can disappear against black or navy material unless you use a high-sheen rayon thread or increase the column width slightly in your editing software. Conversely, on sheer or lightweight fabrics like baby onesies, verify that the design isn't too dense. Baby embroidery requires softness; a stiff, heavily stitched paper clip could be uncomfortable against sensitive skin. In these cases, checking whether the file offers an applique version or a lighter running stitch variant is essential for safety and comfort.
For those creating embroidered patches or items destined for frequent washing, such as kitchen towels or aprons, inspect the corners of the design. Sharp 90-degree angles in satin stitches are prone to fraying over time. If the Paper Clip design features rounded ends, it is inherently more durable for commercial use. If the ends are squared off, consider adding a fray check sealant to the back of the finished product or editing the file to round the terminals slightly. These small adjustments protect the longevity of your handmade product and maintain customer trust.
Commercial Value and Brand Consistency
From a business perspective, this design is a high-value asset for digital product sellers and apparel decorators. Its neutral geometry means it pairs effortlessly with almost any font style, making it ideal for monogramming businesses. It adds perceived value to a personalized gift without requiring expensive licensing fees associated with trademarked characters. For craft business owners, having a reliable, gender-neutral, age-agnostic design in your library reduces decision fatigue during peak seasons like back-to-school or holiday rushes.
However, professionalism extends beyond the stitch-out. Before listing any item featuring this design, confirm your licensing terms. Ensure you have the right to sell finished products versus the digital file itself. Additionally, when creating printable mockups for your online store, accuracy is key. Do not simply overlay a JPEG of the design onto a shirt photo. Use realistic rendering that shows thread texture and shadow. Customers need to see how the Paper Clip actually sits on the fabric. A flat, unrealistic mockup can lead to returns and negative reviews, even if the physical embroidery is flawless.
Essential Pre-Stitch Checklist for Makers
Before you hoop your fabric and press start, run through this practical checklist to ensure your Paper Clip project succeeds:
- Verify Hoop Size: Confirm the design dimensions fit comfortably within your machine’s maximum stitch area with adequate margin for the hoop frame. Never force a design to the absolute edge of the hoop size limit.
- Test Thread Contrast: Stitch out a sample on both light and dark backgrounds. What looks bold on screen may vanish on charcoal fleece or blend too much into white linen.
- Check Stabilizer Pairing: Match your backing to the fabric weight. Use cut-away for knits and stretch fabrics to prevent distortion of the straight lines; use tear-away for stable wovens.
- Inspect Small Details: If you are resizing the design down significantly, check that the inner gaps of the paper clip remain open. Stitch expansion can close up small negative spaces, turning a clip into a solid bar.
- Review Licensing: Double-check whether your purchase includes commercial rights for finished goods, especially if you plan to scale this into a boutique product line.
- Evaluate Washability: For tea towels, bibs, or children's wear, perform a wash test on your sample. Linear designs can pull threads in loose-weave fabrics after laundering if not stabilized correctly during stitching.
The Paper Clip design is more than just a novelty; it is a study in precision and adaptability. Whether you are embellishing a nursery blanket, branding a corporate event tote, or creating a witty sticker-style patch for a teenager’s backpack, success lies in respecting the technical requirements of the medium. By treating this simple shape with the same rigor as a complex portrait, you elevate your work from basic crafting to professional textile art. Always let the fabric and the function dictate your execution, and this design will serve as a reliable staple in your embroidery repertoire for years to come.